

If you want to wow your grandchildren with your knowledge and expertise in using your smartphone, this may be the app for you!
It uses QR codes, those strange square maze-like images that you’re increasingly finding on packaging, books and even television advertising to provide the basis of a treasure-hunt game. Click on the Munzee logo above to get started.
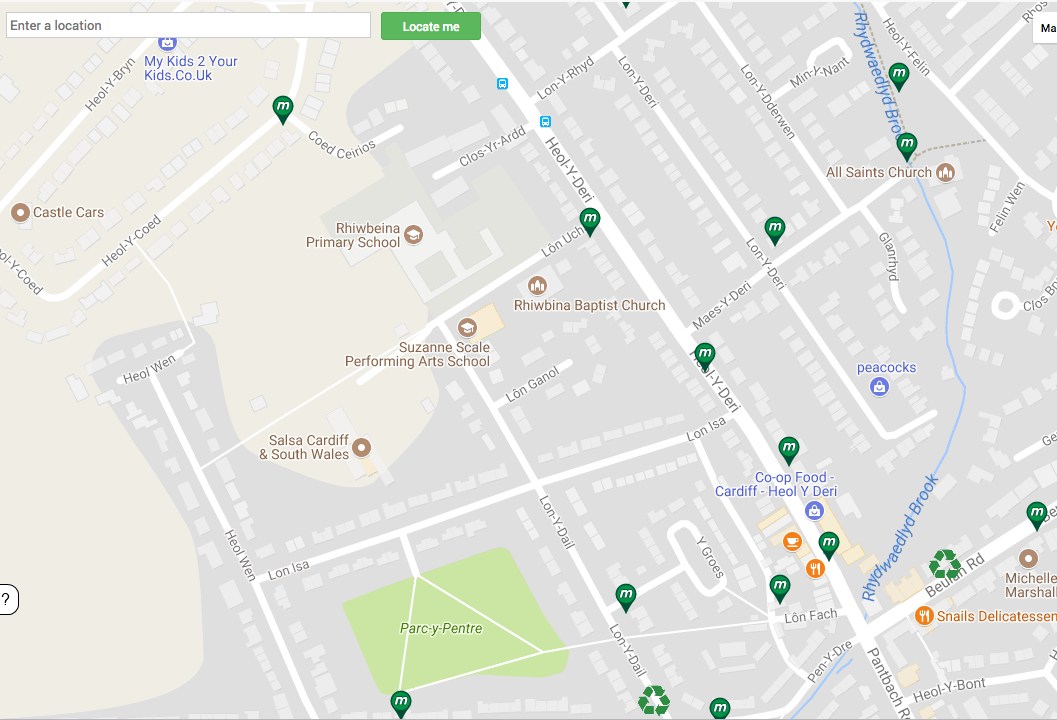 The idea is that you search for “munzees” in your local area, shown on this map thus
 ![]() …
…

… and when you find them, you record that find on your smartphone by scanning the QR code that is on a lamp post, or even under a bench.
If you then want to get really adventurous you can start “hiding” your own munzees and adding to the fun of others.

Anyway, just a bit of fun that I thought I’d share with you to illustrate how QR Codes can be used.
Scan this one and it’ll take you straight to Wikipedia.
Tag: U3A
What's app doc?
Another U3A Computer Group meeting, another terrible experience with flaky WiFi, much more flaky than any experience any of us might have experienced anywhere else; a second attempt to discuss Facebook – failed because of the aforementioned WiFi problems; a reasonable attempt to get members registered into our Google+ Community and a discussion of WhatsApp – which is what this post is really about.
![]() WhatsApp is a multi-media Messaging Application, owned now by Facebook (with potentially all that might involve), which allows the sharing of videos, photographs, as well as enabling voice and video calls, document sharing and straight-forward text messaging between mobile devices on WiFi. That’s about it in a nut-shell – if I’ve missed anything out, go to the link above and find out more for yourself. However the purpose of this short post is just to point you to another couple of links.
WhatsApp is a multi-media Messaging Application, owned now by Facebook (with potentially all that might involve), which allows the sharing of videos, photographs, as well as enabling voice and video calls, document sharing and straight-forward text messaging between mobile devices on WiFi. That’s about it in a nut-shell – if I’ve missed anything out, go to the link above and find out more for yourself. However the purpose of this short post is just to point you to another couple of links.
Members mentioned that there wasn’t a WhatsApp App for the iPad (or other tablets), well here’s a link to how you might be able to run WhatsApp on an iPad as long as you have a Smartphone, and here’s another one from MacWorld which explains the same workaround. Neither of these are truly satisfying, but at least it allows you to use the app from your iPad. If all you want is Chat, there is an App that you could install on an iPad, but I have no experience of using it.
If you want to install WhatsApp on your Windows or Mac device, there appears to be an App to allow you to do it, but again I can’t give you any advice on how good it is. This blogpost from WhatsApp explains where they are with the desktop version(s) of the App.
And that’s about it. I don’t use WhatsApp. Perhaps I should, but other tools I use such as Facetime and iMessage in my Apple ecosystem do the trick well for me, and I do still like Google Hangouts.
Flaky WiFi, or what? [Updated 4th Feb, 2021]
![Flaky WiFi, or what? [Updated 4th Feb, 2021]](https://thoughtgrazing.com/wp-content/uploads/2016/10/WiFi.jpeg)
Have you ever experienced a dramatic fall in the internet performance of your computer, phone or tablet when your device is connected to the WiFi network in your house? You have? You may be suffering from “flaky wifi” – I hadn’t heard the term before, but it’s for real! Just Google it and you’ll see it does exist; but what is it, and how do you rectify the problem? It might be intermittent, or might be permanent. Can you solve the problem? Yes you can.
First some background information – you can skip this if you want.
Let’s look at how the broadband (the 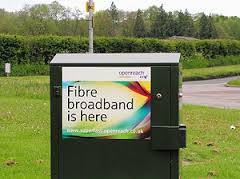 internet) enters your house. If you’re lucky you will have a fibre-optic connection which would give you the fastest speed and performance but the fibre only runs from the Exchange to a Street cabinet. From the cabinet to your house the connection will be by copper. You can
 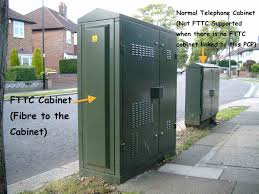 recognise whether you have fibre in your area by looking at the BT street cabinets. If they’re like the one on the left – you have. If they’re smaller like the one on the right of this picture and don’t have vents in them (necessary for cooling) – then you won’t … yet! Inside the cabinet it is still likely that there will be a tidy arrangement
  of cables and patch leads – not at all like the old telephone street cabinets which usually are rather untidy. So the picture to the left is a couple of rather proud BT engineers looking at a new fibre cabinet. So whether you have copper or fibre to the cabinet, the connection to the broadband in your house will be by copper. This is the same for the cable operators like Virgin Media as well.
internet) enters your house. If you’re lucky you will have a fibre-optic connection which would give you the fastest speed and performance but the fibre only runs from the Exchange to a Street cabinet. From the cabinet to your house the connection will be by copper. You can recognise whether you have fibre in your area by looking at the BT street cabinets. If they’re like the one on the left – you have. If they’re smaller like the one on the right of this picture and don’t have vents in them (necessary for cooling) – then you won’t … yet! Inside the cabinet it is still likely that there will be a tidy arrangement  of cables and patch leads – not at all like the old telephone street cabinets which usually are rather untidy. So the picture to the left is a couple of rather proud BT engineers looking at a new fibre cabinet. So whether you have copper or fibre to the cabinet, the connection to the broadband in your house will be by copper. This is the same for the cable operators like Virgin Media as well.
Your broadband provider (your Internet Service Provider, or ISP) will have given you a device that presents the internet into your house. This could be done in a number of ways, but for this discussion I will call the device a hub. The hub incorporates two components – a modem which pulls the signal from the street cabinet and pushes a signal back, which in turn is connected to a router which handles the distribution of the signal to your various devices in the house. Sometimes these are two separate devices, in the case we’re considering they are one and the same. Your router will probably itself have two components – an aerial for sending and receiving a WiFi signal and a number of ethernet ports to allow you to directly connect a device by an ethernet cable to the router.
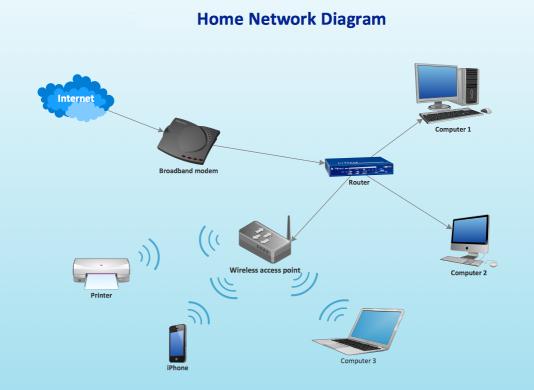 [This is always faster and more reliable than using a WiFi connection – but more about that later.] In the diagram to the right the WiFi is being delivered from a separate Wireless Access Point. This is not the normal way of providing Home WiFi nowadays, but before the introduction of “the hub” – it was.
What’s this got to do with “flaky WiFi” I hear you say … we’re getting there, but if you want to fully understand how the internet works you would benefit from an explanation of another piece of wizardry – the Internet Protocol, or IP address. You can skip this bit too if you like.
Every device connected to the internet has an IP address, some are Public, some are Private. Almost certainly all the IP addresses in your house, behind the router will have Private IP addresses. Your ISP will dynamically allocate an IP Address to your router when it sees it’s switched-on, ready for connection. This will be from a store of addresses it has and will look something like this – 86.10.6.1 – this is effectively the equivalent of the telephone number for your house. As the number of Public IP addresses is limited, your router will then allocate an IP address to each device from a Private range and these will look something like this – 10.0.1.2. It is the job of the router to map the devices from the Private range of IP addresses to the Public IP address space of the Internet.
So you can see I hope that the Router is a really important piece of equipment as it handles all the transfers of information to and from the internet using IP addresses. If you’re using wired ethernet connections that’s really all you need to know (there’s loads more but not for this post) and as long as your hub is working and has the correct lights shining all should be well. However we have the wireless network to consider, don’t we? So now we come to “flaky WiFi”. At last, I hear you say!!
Your wireless router (or hub) broadcasts signals to devices on different channels (like TV channels). Usually when you switch it on it will configure itself to use the best available one. However, if another network nearby (say next door) is using the same channel there will be interference between the two causing the signal to be interrupted, the information to be resent, the performance to drop. This is the most common reason why you will get “flaky WiFi”. Other reasons may be that you are too far away from the wireless router to get a good signal, you’re moving about, the walls are too thick, the router is not located in the best position to cover the whole house, the wireless card in your computer is damaged in some way (or is just too old to get good performance), or your software is not configured correctly.
I can’t deal with all of these but here are a few links that you may wish to follow up these …
For the Mac user – Lost WiFi: How to fix WiFi connection problems.
A reasonably readable piece – How to troubleshoot wireless router problems.
A more complex but good explanation – How to troubleshoot a flaky internet connection.
… for now I’ll just go through a couple of situations.
1) If the signal as shown on your device gets stronger the nearer you get to the router, your problem is likely to be the siting of the router. You need to move it closer to where you wish to use the device, or consider a wired connection instead. This might sound daunting, running cables and the like, but you can buy a pair of Powerline plugs and connect the router to the device using your internal mains electric circuit. Alternatively, you could extend your network, again using Powerline technology to provide a Wireless Access Point near to where you want use your laptop, phone or tablet. [Note: There are other manufacturers and suppliers of this technology other than Trendnet and Amazon, this is just the kit I use. Furthermore {Feb 2021} the use of Mesh systems has become more common.]
2) If the WiFi is definitely “flaky”, it’s intermittent, or undependable, you’re most likely to need to change the channel. You may be able to do this yourself using the management software provided for your hub, but you may also find it better to contact your ISP, explain your problem, say that you believe you may need to change the channel and they’ll talk you through doing just that. [They may indeed be able to change it remotely.]
That’s it. I knew about channels before writing this, but not the term “flaky WiFi”. I’ve learnt something new!
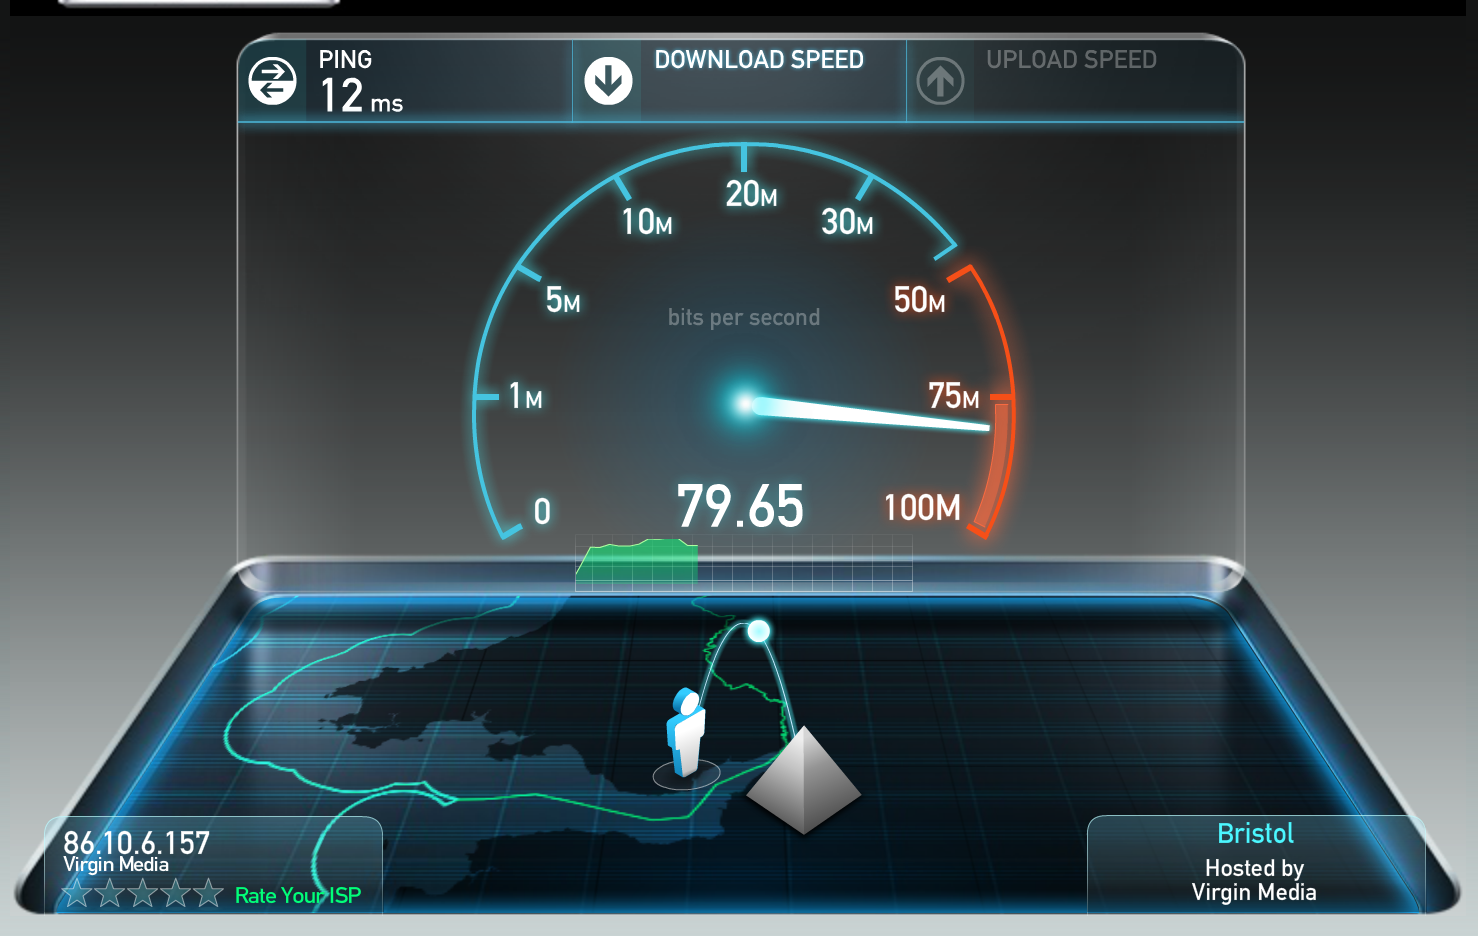 PS If you want to know just how well your device, and/or network is performing why not use Speedtest, it’s available for mobile devices like phones and tablets as well from the App Store or Android Store. Here’s a screenshot of a test I just did on a wired connection in my house using Virgin Media as my ISP. It’s quite addictive.
It's in the Cloud – Part 1
Attending my first meeting of the Cardiff University of the Third Age (U3A) Computer Group, I offered to write some notes to accompany the talk that was given on Data Storage in the Cloud by David Reeves. So here goes …
Computing has moved a long way from the days when all you stored on your computer were words and numbers. Gradually this has been extended to include first pictures, then audio, and then video. With the addition of these media so the requirements for memory to store them increased first by needing an increase in the Random Access Memory (RAM) that the computer had so that you could actually view or listen to the media, and then in the disk storage you needed to hold and recall the images or music at a later date.
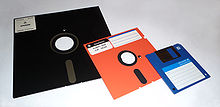
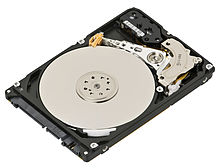 This need for additional storage meant first the introduction of floppy disks, then hard disks inside the computer, then external hard disks
 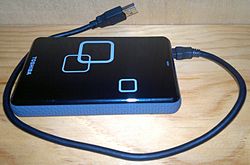 connected usually to a USB port on your computer and then flash drives which you could carry around
  with you and then connect to a USB port on your computer.
With the changes in technology, so the amounts of information stored by each device increased. To give you an idea of how much this has changed you might like to look at the table below – which is actually out of date because you can now get both USB Memory Sticks and Hard Drives considerable larger than those quoted here.
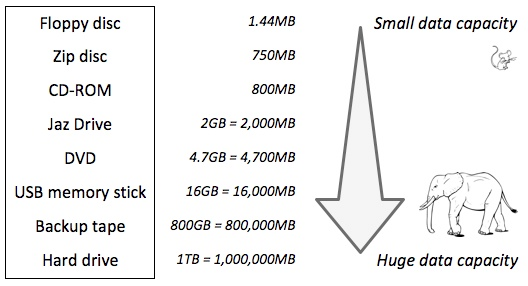
If you want to read more about Information Storage including some technologies I’ve not discussed here such as CD/DVDs you could follow this link or this one, but there’s far more information in these articles than you need to understand why it might be a good idea to store information away from your computer – in the cloud.
Before we do that it might be a good idea to raise an issue that storing all this data causes – what happens if the device breaks, gets corrupted in some way, or just simply gets lost! Now, computer professionals have always done back-ups of their stored data (or they should have done), but the home computer user has never really put a value on their data UNTIL they lose it. So backing-up your data (stored information – words, numbers, images, music and videos) is actually an ESSENTIAL part of owning a computer. This article describes the various ways you might consider backing-up your data but at the bottom of the list is Cloud Storage and that’s where I’m going to take you now.
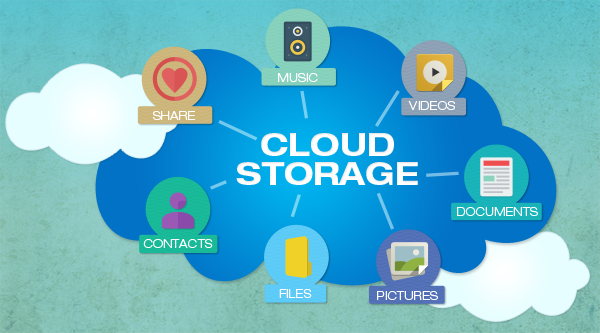
Wouldn’t it be great if every time you saved a picture, word processed document, spreadsheet … whatever, a copy was automatically made and stored away from your computer so whatever might happen to your computer, the most important part of it – the information it stored – was safe. That’s the essential value of Cloud Storage and the most important reason for using it. We’ll turn to the second most important reason – sharing information with others – later.
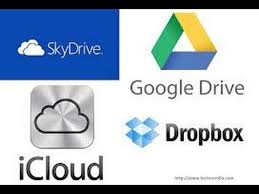 There are a number of Cloud Storage options you can use for free as long as you keep your storage below a certain limit. You can use as many as you want to and you might consider using different providers for different purposes. For instance I use Google Drive mainly for Photo Storage, Apple’s iCloud for documents, and Dropbox for sharing stuff. [I’ll maybe explain why I do this in another post.] The other main provider is Microsoft with their OneDrive (formerly SkyDrive) offering, I don’t tend to use this much, but the principles for using it are much the same as the others.
So how do you use them? As I said above, the principles for each are much the same. I will use Google as the main example, and provide links to the others as well.
Google Drive. You will need a Google Account. This is a good idea in any case as it allows you to create another eMail account – I’m a strong advocate for having more than one eMail address anyway (see Point 3 in this post). Go to Google Accounts to setup your Google ID – you can use your existing eMail address if you want to. Then with your account set up you can go to this page. I would suggest you download the applications for your desktop as well as setting it up for your browser. Installing the application on your Windows PC, or your Apple Mac, will then create a Folder in which you can store information and which then will then be backed-up to your Google Drive “in the cloud”. Voila – you have peace of mind that your precious information has been saved. Any changes you make to the information will be synchronised with the version saved on your cloud storage.
For Dropbox go to this link and create your account, perhaps using the Google email address you’ve just created above – a lot of services allow you to link to your Google ID and this means you don’t have to remember lots of IDs and Passwords.
If you’re an Apple user (iMac, MacBook, iPhone, iPad, etc) it makes sense to use iCloud. Even if you’re not, you can still add an iCloud Drive to your desktop and access the 5Gb of free storage you’re provided with “in the cloud”.
If you’re a Microsoft (Windows and Office) user it makes sense to use OneDrive. Like iCloud you get 5Gb of free storage from this link. You may also find that you are offered the option of installing OneDrive when you install Microsoft Office (or Office 365).
Finally sharing information with others. I don’t think I can improve on David’s demonstration and on this YouTube video …
I’ve focussed on using a Folder on your desktop/laptop machine to backup or synchronise files to your Cloud Storage. Remember also that David demonstrated how you can Upload a file using your web browser (I would recommend using Google Chrome) from your desktop to your Cloud Storage.