I've now had an introduction to the SBOD

Now I’ve been uber-charitable about Apple and their MacOS, but yesterday and today I was introduced to the Spinning Beachball of Death which froze me out of doing anything on my iMac whilst I trawled the internet (on another machine) trying to find out what could be wrong.
I’d not left the machine on, in sleep mode, and yet it just crawled through boot and sign-in until it basically gave up the ghost when it got to the Desktop. What could it be?
Obviously it was probably a hardware problem … wasn’t it? Well a bit of Cmd + R work, running disk utility showed everything was in fine fettle, many re-boots later things seemed to be improving, but not all was right. What could it be? Try logging-in to another account on the same machine I thought. Well I had one, but it wasn’t an Admin account, but it was worth a try. This seemed to be much better so I was now thinking about Corruption of the User Profile and the need to Restore from a Time Machine backup … maybe. But then, out of the blue, all seemed to be well again … until this morning, when the SBOD returned.
This time I knew it was likely to be something to do with my User Profile, so I setup a new Admin account once I managed to get to the screen that allowed me to do that. Logged out, and then logged into the new account and, as I hoped, the login screamed through. I set up the machine and right at the end I was told that my Paragon NTFS for Mac (which allows me to read Windows files) needed to be updated as it was not optimal for my version of MacOS (High Sierra, 10.13.6). The penny dropped! This software wasn’t installed on my MacBook Pro. This piece of software was interfering with Finder on the iMac in some way to slow everything down. Quickly into System Preferences then, disable the NTFS for Mac driver, and re-boot. All seems to be well. Some hard lessons learnt and a lot of time wasted.
The lessons learnt?

  1. Have a spare Admin account on your machine so that you can check your user profile
  2. Disable, or Uninstall any software that you’re not using because inevitably it will go out of sync with something else
  3. Make sure that you know how to start your machine in a number of different ways to check for faults – I had to print out a cheat sheet to do this
  4. Make sure you have an up-to-date backup … just in case; I did, so that was my last option, and I’d have been OK … I think!


 

ICE – that's In Case of Emergency

Recent discussion in U3A has been on what role a Group Convenor should have in case of emergency. It’s a difficult one, I haven’t fully resolved in my mind what responsibility I should have – I think it’s one that’s worth discussing. Should I, can I request that information be lodged with me? Should the group member provide it to a membership record on a database system that the Convenor can access? Or, should – and this is the purpose of this post – the individual take the responsibility upon themselves. This can be done by either carrying a card – this one is used by The Ramblers – there are many providers of this sort of card, eg ICEcard, or should we use the facilities on our Smartphones which allow access without unlocking the phone from the Home screen.

How much do you know about computer fraud?


Recently in a U3A meeting we discussed Computer Fraud. We often do, or so it seems. If it’s not fraud, it’s security online, or scams and what’s done with our data … but more about that later!!!

This short post is just to alert people to a simple, short quiz (or test) that has been produced in conjunction with the UK Government to help people recognise fraudulent activity.

Go to this website, satisfy yourself it’s genuine and is a government backed initiative. According to the Daily Mail – so it must be true – only 9% of people taking a test were able to accurately recognise all the scams and false messages, that despite a claim that 80% felt that they were able to recognise a fraudulent message.

Decisions, decisions … Adobe Lightroom

A couple of U3A members have expressed an interest in purchasing Lightroom. It’s a confusing time in the Adobe world at the moment and the window for purchasing a stand-alone desktop version of the software (Version 6) is possibly closing, possibly … I don’t know!!

Adobe wants its users to move on to a Subscription-based Photography Plan which includes access and use of Photoshop as well as Lightroom, or alternatively a new Lightroom Creative Cloud Plan that is cloud-based with loads of cloud-storage and access to just Lightroom.

I decided to join the original plan about two years ago, and I hadn’t regretted it (until recently), but it does involve an ongoing commitment of c.£10.10 (currently) per month to allow you to keep editing your photos. If you cancel your subscription you can still access them, but the main editing functions are disabled. On the plus side you are provided with all the updates and new versions of the software whilst you still pay your subscription. As it was the main piece of photo software I used – it was a no-brainer for me back in 2015.
When I moved from Lightroom v.5 back in 2015, I opted for the Adobe Photography (20Gb) Plan Creative Cloud subscription. This is obtained from this link.

However beware. Adobe are pushing the cloud based service, rather than Lightroom as a desktop application, and are confusingly using the name of the old subscription Desktop application – Lightroom CC – to describe the mobile-world, cloud-based version which they are trying to push to the consumer market.

The desktop application is however ALSO part of the Photography Plan and IN MY HUMBLE OPINION this is the one you should be installing if you opt for the Photography Plan. It’s NOW called Lightroom Classic CC. This is the version that I upgraded to in the New Year – you could call it Lightroom 7.
However, as I said at the top of the message; if you just want a standalone, one-off purchase of Lightroom v.6 with a CD, it’s still available from Amazon for instance (also John Lewis, Curry’s and PC World I believe), or from Adobe direct.

Installing the standalone version from Adobe is relatively straightforward. You need to create an AdobeID as part of the process, and then you get a Licence Key. If you want to save c.£6  and NOT have the CD you can get it as a download to install the software – see the links from the Amazon page to get the “ xxx Activation code by email” version.

If you have an earlier version of Lightroom (e.g. v 4 & 5) you can upgrade it from this link and save yourself about 50% on the purchase price of Lightroom v.6, and if you’ve installed the Lightroom CC trial here’s a link if you want to change to Lightroom v.6

Now this is important. Lightroom v.6 will not be upgraded in the future. It is not straightforward to go back to Lightroom 6 from Lightroom Classic CC (v.7) without losing some of the information you’ve applied with that later version. However for the amateur photographer there is plenty in Lightroom 6 and unless you’re thinking of buying some very expensive camera bodies and lenses in the future you probably won’t suffer from just using Lightroom v.6.

Installation assistance for Lightroom 6 is provided here.
If you decide to go down the Creative Cloud subscription route (as I did initially), you should be careful during the installation process, and you may find it useful to follow the assistance provided in this link.

If you want to ask me any questions before making a decision, don’t hesitate to do so, it will be my pleasure to try and answer them. If I can’t answer the question I will point you to a link which I think will answer the question.

So what is my recommendation? This matter has taken up a lot of my time just recently and I’ve agonised over the decision I should make. You can read about my reasoning and the decision I eventually made to probably stay with Lightroom v.6 whilst trying out Lightroom Classic in this blogpost.

A replacement for iTunes?

This post starts from this paragraph in an earlier post on my personal blog
“How might I integrate my digital music in a better way than I was currently doing it via the Apple TV, and iTunes on the MacMini? The answer … a Sonos Connect system with RCA output to the Marantz amp connected to the iTunes Media folder and a copy of the iTunes Library hosted on a USB-3 disk connected to an AirPort Extreme router. [The master iTunes Library is shared (using Dropbox) around the other 3 Macs in the house – a brilliant solution to avoid maintaining different iTunes Libraries.] I can now listen to the digital music in all three rooms.  Of course, now I have a Sonos Connect, I can stream to other Sonos Play speakers … but that’s for another day, which may actually come sooner rather than later.”
… which formed the subject of my discussion with the Cardiff U3A Digital Group on the 4th January. But I digress … what is the problem with iTunes?
iTunes was introduced shortly after the first iPods as the way/means by which you could store/search for your music on your brand-new revolutionary personal digital music device. And there you have the problem almost defined in a nutshell. It was “enhanced” to add other media to it – video, TV, film, podcasts; and you could synchronise your device to a computer so that the database work could be done on a more friendly device; and with the introduction of the iTunes Store – the focus has switched to selling music and storing it in Apple’s iCloud. But it’s huge problem is that it’s old, and it’s personal – tied and linked to single portable devices. You have more than one device – you have to synchronise them separately unless you rely on playing from iCloud – and the options here are very confusing; you have more than one playlist – you have to copy them to different devices; you want to have all your media in one place – you have to make sure you have your iTunes settings correct otherwise you’ll never know where the media your playing is actually stored.
So the link in the quote above provides an ingenious solution if you want to create a shared iTunes Library when you have more than one device you want to reference a single iTunes Library from. It really does work, and I’ve used this solution for a few words, and until recently I had little trouble from using this method, using my MacMini as the main computer for doing the sync’ing with my iPhone etc. However, after that episode I began to think there must be a better way.
I really didn’t want to use Spotify because that would only serve me music, and in any case most of the music I wanted to listen to, I already had and had transferred from CD to digital.
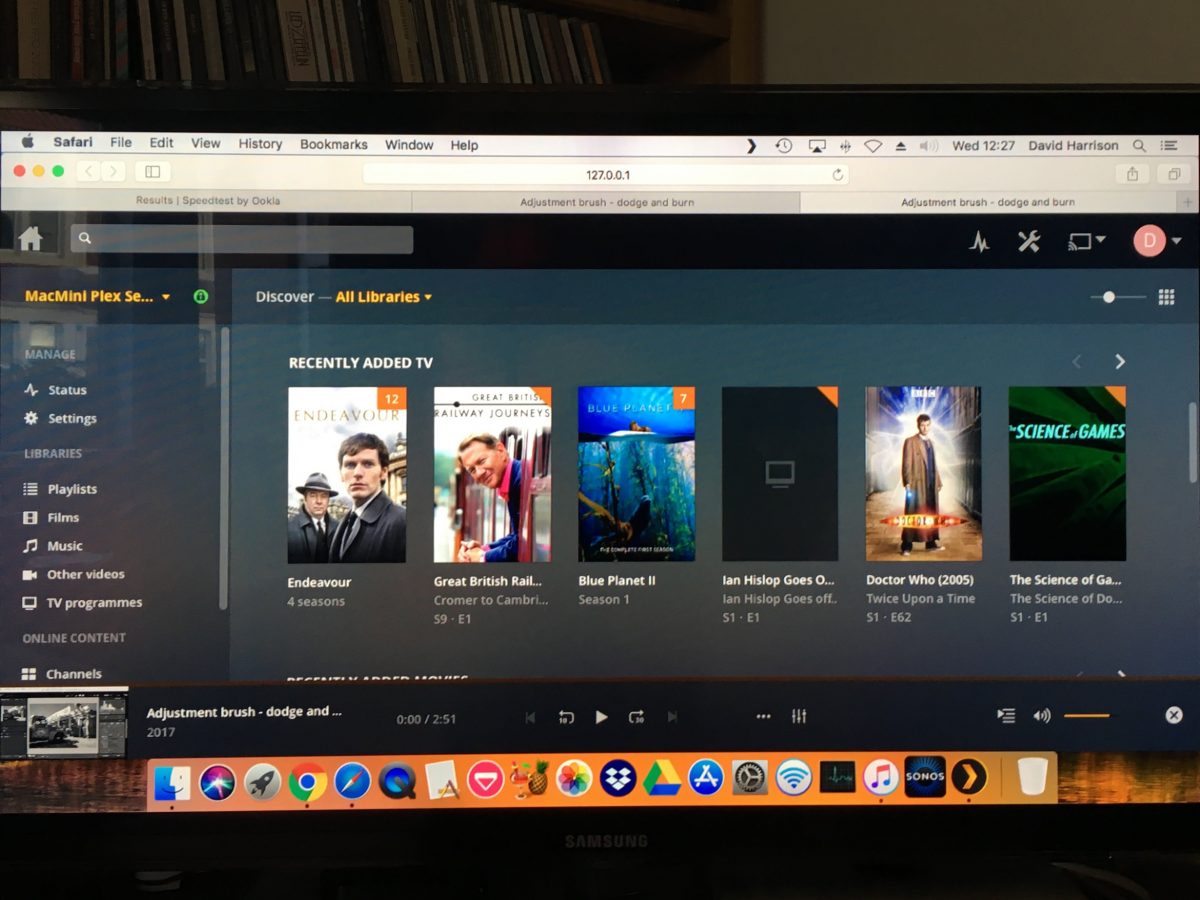
I researched whether I needed to buy more hardware, decided I didn’t, and opted to install Plex on my MacMini, with the media stored on an external USB-Disk. Doing this meant that I could continue using iTunes as well as the Plex Media Server as it looks at the same disk and media folders. And the advantages?
Well the most remarkable is that after purchasing a Plex Pass (the server itself is free) I can access any of my purchased and stored media – films, videos, music, photographs – from anywhere – wherever I am, on any device I have installed the Plex player app – including my Apple TV. It can operate over wired, WiFi and cell connections (if enabled). Isn’t that amazing? Plex is also moving towards streaming its own, or licenced content and offering a LiveTV service. Please read the Wikipedia article for more information.
It really is very easy to setup!